A Step-by-Step Guide to Painting Cast Iron Radiators with Farrow & Ball Radiator Paint

Cast iron radiators are one of the fashionable add-ons in your house while combining antique charm with excellent heat retention. Their looks can be enhanced further by painting with high-quality, non-wear paints such as Farrow & Ball Radiator Paint, thereby not only enhancing their look but also ensuring that they do not rust and wear for you to enjoy as a piece in your home for the next number of years.
Step-by-step painting of cast-iron radiators with Farrow & Ball Radiator Paint in this masterclass. We will instruct you through the process in such a way that, following these instructions, you will be able to produce a professional finish on your radiators while their functionality is completely retained, along with adding some character and personality.
Why Farrow & Ball Radiator Paint?
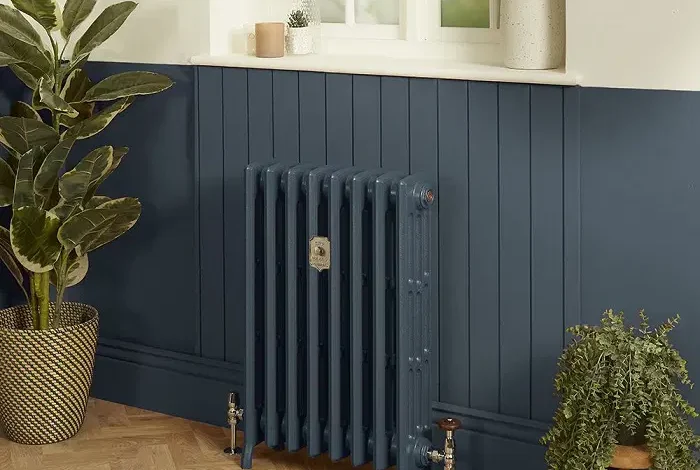
Farrow & Ball radiator paint is designed to resist the highest temperatures of radiators with no cracking or peeling, giving a smooth, lasting finish that brightens up the old cast-iron radiators, making it look fresh and new. Paints are also available in a number of elegant colors and easily matched to your radiator as well as to your room’s décor or as a standout feature.
With Farrow & Ball’s eco-friendly formula, you can always expect water-based paint that’s low in VOCs and safe for use in your home. The paint has heat-resistant capability; hence, you can always expect the finish to last longer without degrading as time progresses, even with constant usage.
Step 1: Materials Required
You will have to prepare all the materials for painting your cast iron radiator before you start. This includes the following:
- Farrow & Ball Radiator Paint
- Primer (if your radiator is unpainted or has rust spots)
- Wire brush or sandpaper
- Masking tape
- Dust sheet or drop cloth
- Paintbrushes-including a small brush for the detailed areas
- A clean, lint-free cloth
- Warm soapy water
- Protective gloves
Make sure that your radiator is off and cool. Paint the radiator once it is not hot; this way it will not make the paint dry irregularly and finish poorly.
Step 2. Preparing the Radiator Surface
Achieving a glass-smooth, long-term paint finish on your cast iron radiator requires proper surface preparation. If the radiator contains old paint, peeling areas, or rust, these must first be addressed before painting.
First, clean the radiator with warm soapy water, and flush all dust, dirt, and grime. Use a clean cloth to wipe out the residue-free surface. If it has any rust spots, gently remove them using a wire brush or sandpaper. Then, prime for paint adhesion onto a smooth surface.
Now clean the surface completely and eliminate imperfections. Dry the radiator with a lint-free cloth till the radiator is completely dry. Ensure there is no water content before proceeding with the following step.
Step 3: Primer Application (When Necessary)
If your radiator is unpainted or the metal is exposed after rust has been removed, you should first apply primer before painting with Farrow & Ball Radiator Paint. Good quality metal primer will protect the radiator from any form of rusting, and provide it with a solid ground for the paint to attach itself.
Apply with a brush an even coat of primer on all the surfaces of the radiator, paying special attention to covering the edgings and space between columns. Take your time to cover all areas as these tend to rust quickly if not well-primed. Let the primer dry on the radiator before proceeding with any other process. The drying time may take up to a few hours depending on the type of product used.
If the radiator is old, painted, and sound, you can skip the priming step. Therefore, it should be thoroughly cleaned and smoothed out before the application of Farrow & Ball Radiator Paint.
Step 4: Protect the Surround Area
Painting cast iron radiators gets messy, so it’s a good idea to cover the areas around your radiator before you begin. So, underneath the radiator use a dust sheet or drop cloth. If your radiator goes all the way up to adjacent walls or furniture then mask off areas and edges you wouldn’t want to get paint on with masking tape.
This will save you time and elbow grease in cleaning afterwards as well as result in a clean finish to your radiator.
Step 5: Applying First Coat of Farrow & Ball Radiator Paint
Now that you have cleaned the radiator, primed, and protected the area around it, you are ready to apply the first coat of Farrow & Ball Radiator Paint. Never forget to use a good-quality brush because only with it is your smooth, even finish guaranteed.
The radiator’s smaller parts are actually the first sections to paint back on the radiators where they go between columns and along edges. Then apply with a broad brush to the flat surfaces of the radiator. Farrow & Ball Radiator Paint is made to last, so it can be applied thinly and evenly without concerns of drips or runs.
Let the first coat dry fully before applying subsequent coats. Farrow & Ball suggest a minimum of two hours after new coats, but it is always best to refer to the manufacturer’s instructions for drying time.
Step 6: Application of a Second Coat
Once the first coat is totally dry, you can have a second coat applied. This will make even a coat and finish the cast iron radiator you are on your way to getting the appearance of being placed in a proper and well-polished place.
And just like in the first coat, simply always try to cover the finer parts first then work your way up towards the larger surfaces. Put simply, the more thin coats of paint applied, the less likely it will happen that those parts will not dry evenly or even worse, leave brush marks.
Allow the second coat to dry completely before turning on your radiator. It is very important to let paint fully cure so that your finish isn’t ruined by heat.
Step 7: Clean Up and Inspect
When the paint is completely dry, carefully remove the masking tape and the dust sheet. Inspect the radiator for areas that were over-sprayed or uneven. Touch them up with a small brush if necessary.
You will then allow the radiator to stay for 24 hours after you are content with the outcome. Then proceed to turn it on to emit enough heat to help the paint settle and stay for a long time it.
How to Care for Your Painted Radiator
A newly painted cast iron radiator needs to be well cared for. Use a soft cloth to lightly dust it, and avoid harsh chemicals or abrasive cleaners that can damage the paint. By keeping it this way you will ensure that it becomes a beautiful feature in your home for years to come.
Conclusion
Refresh the look of cast iron radiators with Farrow & Ball Radiator Paint. Bring them back to their former glory and protect them against rusting. Now you can achieve the professional finish on your radiant heaters with the easy-to-follow steps below. Whether it’s an interior-design-matched or contrasting finish of your choice, Farrow & Ball offers the choice of colors to suit your heating.


